Lofting preparations
With the shed almost finished and because the daylight period during a day is getting shorter every day it’s time to start lofting the boat.
I was really planning the shed build to get finished, over and done with already by the end of June but somehow things got dragging because of other issues, minor and major and getting sidetracked by some other DIY projects like building a trailer together with my uncle for the existing boat.

Anyway. As I was saying, the shed is not yet completely finished - the walls just underneath the roof still need to be covered by ~30cm planks but this job of cutting to length can wait for some rainy days now as well because now I have a roofed shed I can do it in.
Instead it’s actually a good time now to get the full-size plans drawn so I can approximate the timber amount and sorts that’s going to be required and maybe purchase it over the winter and have it sitting around in the shed or outside until the end of spring next year when the weather is warm enough to start the build again.
By definition lofting is a drafting technique (sometimes using fixed measure
tables) for generating curved lines for streamlined objects like aircrafts and
boats (sourced from wikipedia). Searching the
interwebs I found a really good guide into the whole lofting process called
Lofting a Boat: A step-by-step manual
by Roger Kopanycia. This book is essentially like the Ikea-manual of lofting a boat,
very easy to follow and do-along. There are 3 main views of the boat that are
to be drawn full size (and a couple of others to make life easier):
- profile view, usually drawn of the starboard side
- body plan, half of which is looking at the boat from the aft towards fore (on the left) and from the fore looking aft (on the right), and
- half-breadth view, of half of the boat along the centerline (keel)
Both the body plan and half-breadth are only drawn for one half of the boat as the other missing half should be symmetrical with the drawn half anyway. And usually what you’d do is swing open the door to your 200m2 building space, clean the floor, paint it with a fresh coat of white paint, measure and draw out a lofting grid and get cracking at the plans. But… given the slightly less than 20m2 that I can utilize, required a somewhat different approach.
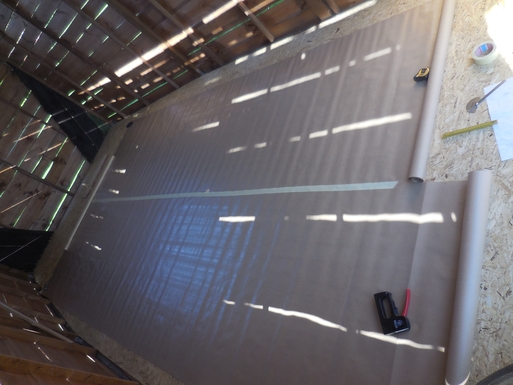
I could have laid all the drawings on the floor on top of each other in different color pens but accounting for the amount of lines that will be drawn (imagine the clustering problems of different map symbols), and the fact that the design will be 7.5m but I only have 6m of floor space I decided to use building-paper instead and do all these three drawings on separate sheets so I could roll them open and roll them closed (because a lot of measurements are transferred from one view to another one) just as was needed.
I know there are cons to lofting on paper because of changes to the dimensions (weather) and maybe you can’t always get it lying totally flat on floor. The paper rolls I purchased wer coated with a thin film on one side (I think the exact term for it is vapour paper ) 1.25m wide and 25m in length so in order to draw the profile (which is just above 2m at it’s highest point) I cut two 8m sheets from the roll and used masking tape to stick them very carefully together paying extra attention to keep both sheets as aligned as can be in order not to cause any deformations in the finished sheet. Also half-breadths needed a ~40cm extra edge, and also the pane for the body plan consists of two 3m sheets taped on the longer side yielding a 3m*2.50m sheet.
With the paper sheets ready, I headed out to the shed. But there’s one thing more. The process of drawing nice, fair curves consists of measuring out known distances then driving nails at those spots and the pushing a batten long enough against all of the nails. If the batten does not touch some of the nails it means that the measurement at that specific location is wrong:
- you measured it wrong on the lofting floor? check your tables!
- inches? you made an error during imperial-to-metric conversion? reconvert, measure and mark again!
- if not either of these cases then the measurement is most probably wrong in the offsets table an you should trust your batten.
The longest batten I found in the house was a 2.5m oak baseboard (the wooden strip that goes on the floor against the wall to hide the cracks between the floor and the wall and maybe the internet cable aswell…) about 1*5cm in cross-section left over from some distant years ago. This was the batten that helped to shape all curves for the old boat so I guess you can say I am emotionally attached to it. But as I needed something considerably longer I went out and got some plywood, ripped 5cm slices out of those and laminated them together using epoxy glue to get myself a 7m batten. Now at hindsight I know I should have left it drying on a flat surface as the thing got a few bends into it making me a bitsy unsure of a few lines. But if everything clicks together in the end then there’s no problems. But I’ll know that in the end.
The other thing worth confessing here is that I will not be able to draw the longest curves in one go (remember - no space to lay out the paper sheets full size with the possibility to bang nails into the floor!). So instead I marked, checked and if needed, remarked the long curves all in multiple goes consecutively over repeatedly in order to achieve could-be fair curves.
Now, armed with a batten, offsets tables from the plans converted to metric, four different color marker pens, a metal ruler and paper rolls I was ready to start laying down the lofting grid lines.